

How To Install Wamp Server On Windows 10
If you are looking forward to developing application in PHP, first affair you lot want is to set a evolution environment. On Windows, WAMP is a popular choice. Permit me bear witness y'all how to install WAMP three.2.0 which was released on 20th Feb 2020 on Windows ten in this blog post.
In this blog we will see:
WAMP is not the only choice yous take for windows. You can as well choose XAMPP which is also stable and skilful. For Linux y'all tin can try LAMP and for Mac, MAMP. Please don't waste material your time in comparing diverse alternatives available to you lot. They are all good. All I tin say is that get yourself a development surroundings quickly and start coding. WAMP is a very adept choice and is very stable. Go for it.
- XAMPP is another popular selection for setting up PHP development surround in Windows Os. To see how to install XAMPP in Windows 10, Please visit my blog on how to install XAMPP in Winodws x
- Prerequisites: In social club to successfully install and run WAMP server brand sure that you have VC++ Redistributable installed on your system. Please follow my post and install all the versions of VC++ Redistributable using the link provided in the post at the bottom of the post. This article also tell yous why VC++ Redistributable is important and why you should take it to avert future issues on Windows Platform.
- After the installation if you get the error message that some dll files such equally msvcr110.dll, msvcr100.dll, msvcp110.dll, msvcp100-dll is missing, brand no mistake, it is because Visual C++ Redistributable is missing. I have written a web log on it. Hither is the link.
Hither are the installation steps.
Prerequisite – Install Visual C++ Redistributable
Before you begin installing WAMP Server 3.2.0, you will accept to install Visual C++ Redistributable for Visual Studio 2012 Update 4. It's a simple installation process. Download both 32 and 64 bit versions and install.
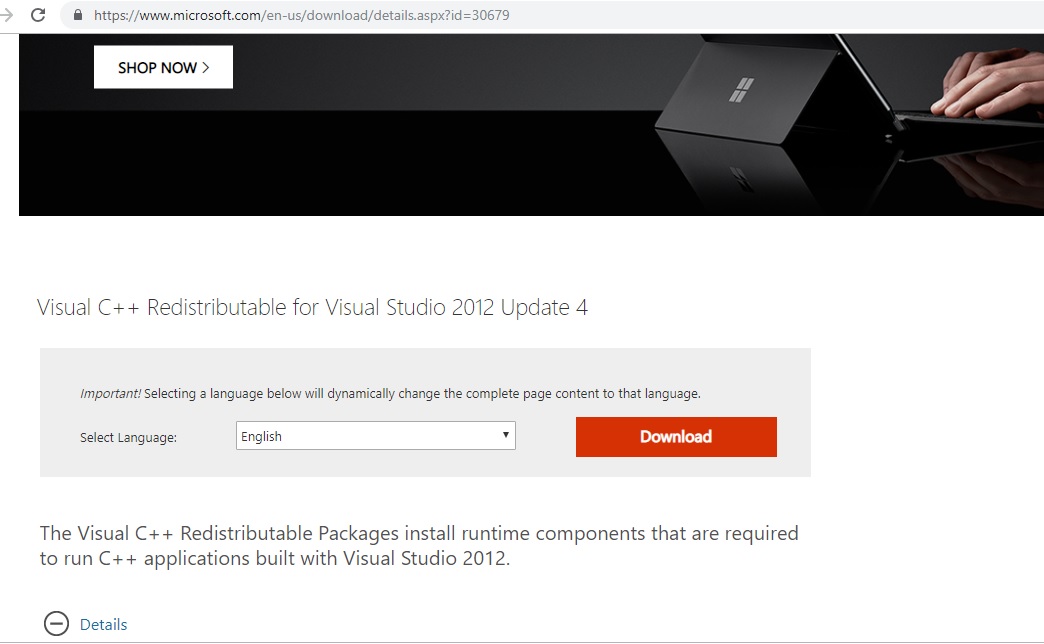
Download Visual C++ Redistributable
Lets first installing WAMP Server:
Steps to install WAMP Server
Please follow the beneath steps to install WAMP Server in Windows 10.
Step ane- Download Wampserver from the official website
You lot tin download the WAMP installer from the official WAMP server from the WampServer website.

WampServer website Homepage Screenshot.
Step two- Ringlet downwardly to the download department of the WampServer Home page.
Based on your system, choose 32 flake or 64 chip version of the installer. I choose 64 bit, PHP 7 version considering this is the latest release of PHP.
These screenshot will not be the same every bit it will alter based on the release of the updated version of the WAMP server. Currently the latest WAMP version is three.ii.0 equally on March 2020.

WAMP Server Download
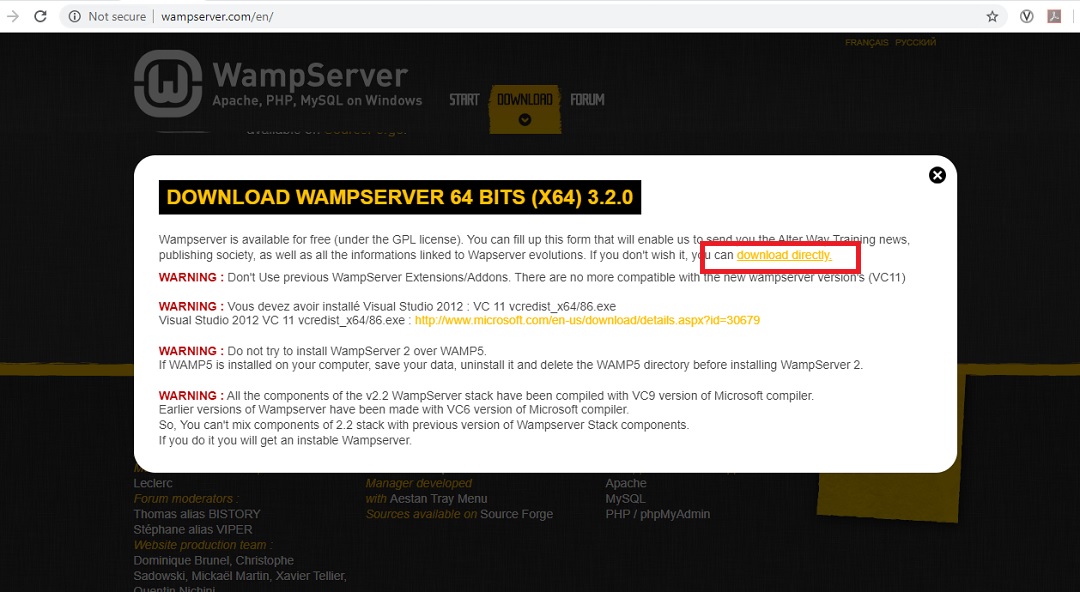
Step 3- Click the appropriate link to download the Installer.
You should see something like this. Click the download directly link to start download. Currently the latest WAMP version is 3.2.0 equally on March 2020.
WAMP Server Download
Step four- Locate the downloaded file.
Past default the downloaded file should be in your downloads binder if you take not changed the default settings. The name of the file would be something similar wampserver3.2.0_x64.exe and would exist 530 MB in size
Stride 5- Double click the installer to begin the installation.
Yous should run across something similar this.
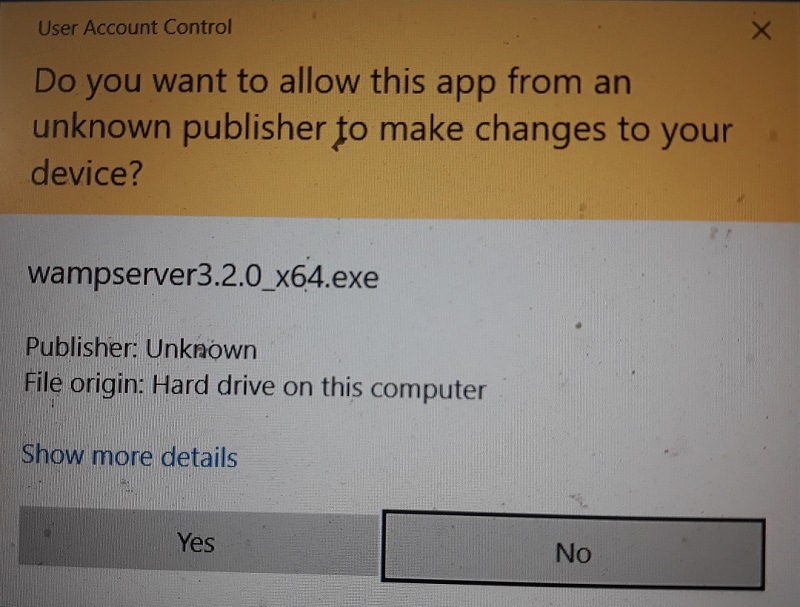
WAMP Installer – Admission Control Security Warning
Click yes to continue. Now you may or may not should see Windows User access control dialog box. Click Yes to continue if yous come across it, else move to the next pace.
Step half dozen- The dialog box that appears will now inquire you to cull your language for installation.
Select your preferred language from the driblet down listing and click OK. We will exist using English language for this sit-in.
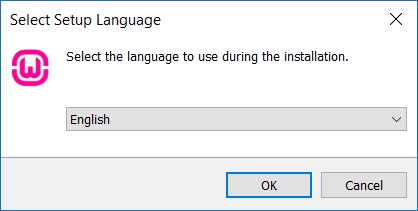
WampServer installation select language for installation screenshot
Step 7- You should come across WampServer Licence understanding dialog box.
Click "I have the understanding" radio push button and next to continue.
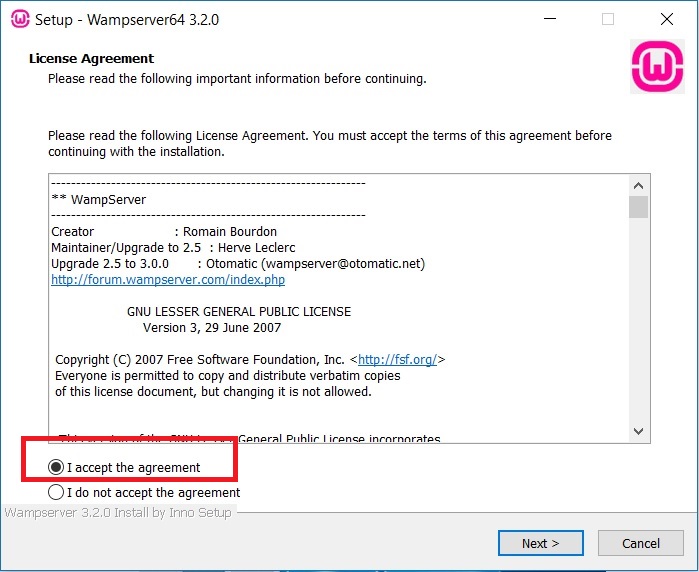
WampServer installation Licence agreement Screenshot
Step eight- Now you should encounter an data dialog box.
This informs you about the prerequisites, or the required component that must be present on your windows machine for the WampServer to function correctly. What'due south required is the appropriate version of Microsoft VC++ re-distributable package. You tin can still keep to install WampServer without issues. But subsequently installation when you lot start the wampserver and get fault message complaining about a missing file, please follow my post which tells y'all about the error and what should be done to resolve it.
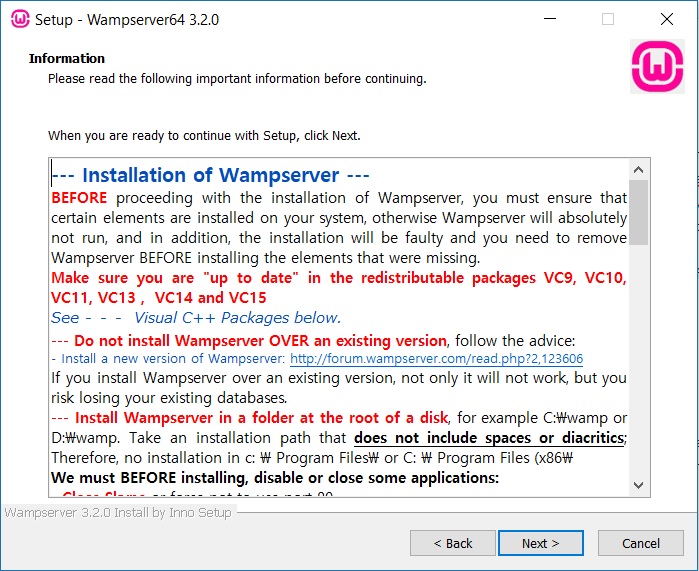
WAMP Server Installation – Information
Stride 9- Select the location where you want to install WampServer.
You tin can accept the default and click next.

WampServer Installation- Select destination folder dialog box
Step 10- Select Components
In this dialog box, yous have to select the components that you lot want to install. I select all the versions of PHP then that I have flexibility in awarding testing considering the hosting providers may not offer the latest version of PHP. I also select both MYSQL and MariaDB. This again provides me with a larger development options equally hosting providers offers both MariaDB and MySQL.
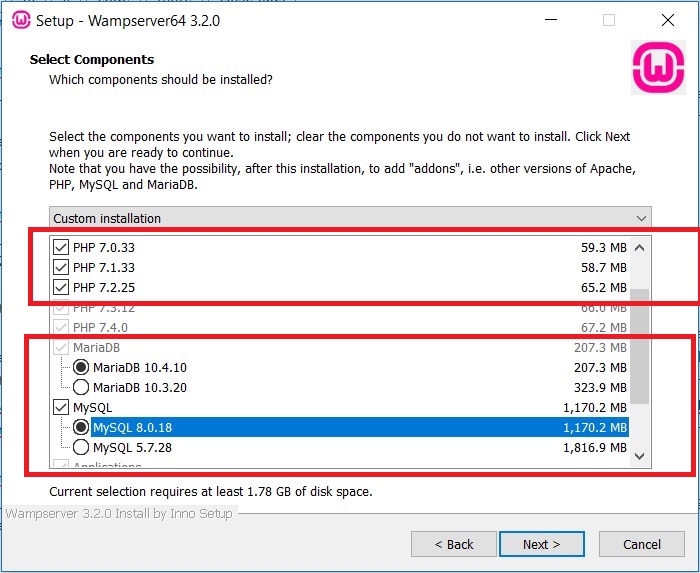
WAMP Installation – Select Components
Click next to continue.
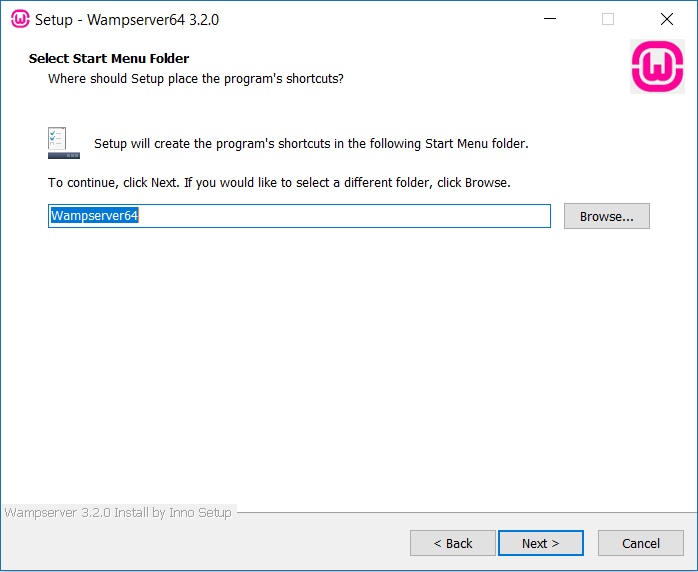
Pace 11- Select Kickoff Bill of fare Folder
In this dialog box you have to select the folder in which the program shortcuts should be placed. If you select the default, it would be placed in C:\ProgramData\Microsoft\Windows\Offset Menu\Programs\Wampserver64. This binder content is accessible from the windows kickoff button, all apps in windows ten. If you place in any other folder, the shortcut will non be visible from the start menu.
You can change information technology to something else but accepting the defaults is perfectly practiced. The 64 at the cease of Wampserver64 is tell yous that you volition be using the 64 scrap version of the application. If yous dont see 64, so yous will be using the 32 bit version of the application.
WampServer Installation select beginning menu folder screenshot
Step 12- Finally y'all see the Ready to install dialog box.
You can review the details of the components that will be installed and make the changes by going back by clicking the Dorsum push. Once yous click Adjacent, installation begins.
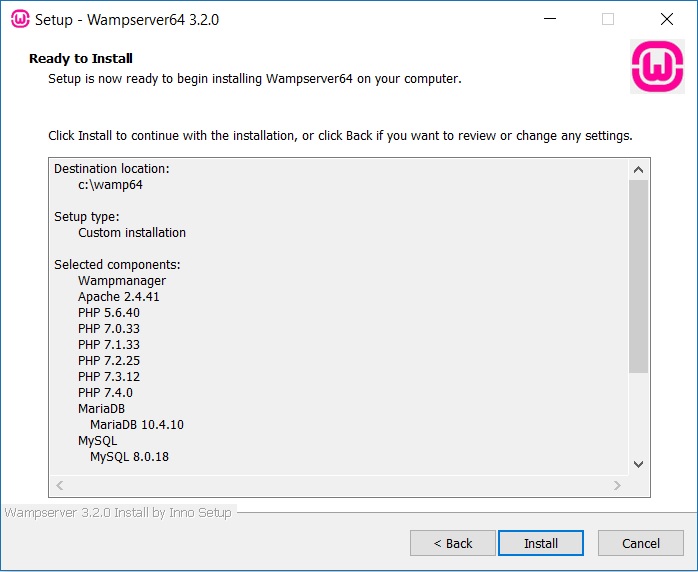
WampServer Installation Gear up to Install Dialog box
Click Next to brainstorm Installation. Now you lot volition see installation begins. Below is the screenshot.
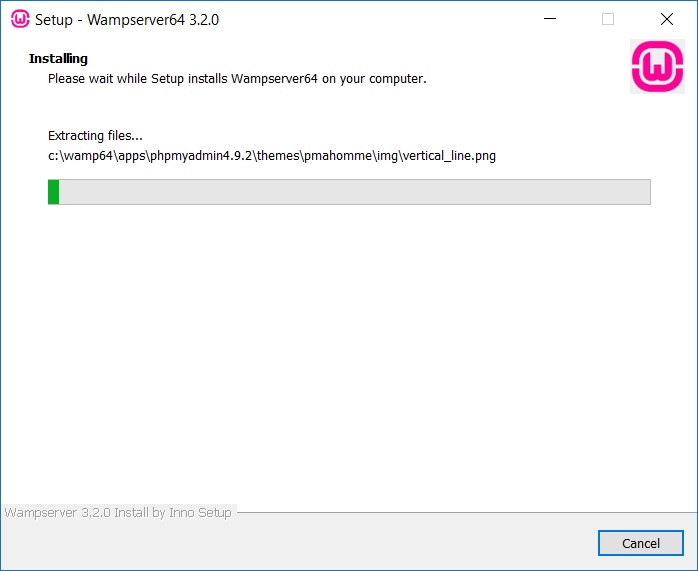
WampServer installation progress screenshot
Step 13- Select default browser dialog box
Now you should run into a dialog box asking you if Net Explorer should exist fabricated the default browser and asks you if yous desire to change the default browser to something else. Click NO to take Internet explorer equally the default browser.
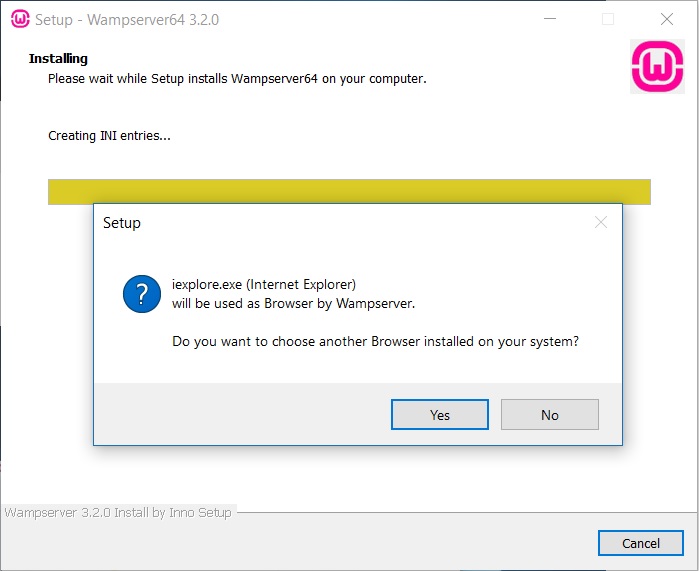
Wampserver installation choose default browser screenshot
If yous want to change the default browser to say Google Chrome, click yes and y'all will be asked to specify the path of the execuatble of the browser say Google Chrome.:
In Windows 10, Google Chrome executable is located in C:\Program Files (x86)\Google\Chrome\Application folder by default. Get to this folder and select chrome.exe and click open up. If you click cancel, it would again default to Internet Explorer.
Again the choice betwixt Internet Explorer and Chrome or anything else is purely personal and I don't come across whatsoever upshot in accepting the default and leaving it as Net explorer.
Step 14- Select default Text Editor
I would suggest yous can take the default, which is notepad by clicking No. Its simply that if yous desire to edit apache or PHP config files such as http.config or php.ini, it would open in notepad. Still if you desire to change it you lot tin can click Yes and navigate to the executable .exe file of your preferred text editor. Just, equally I said, the default notepad is perfect.
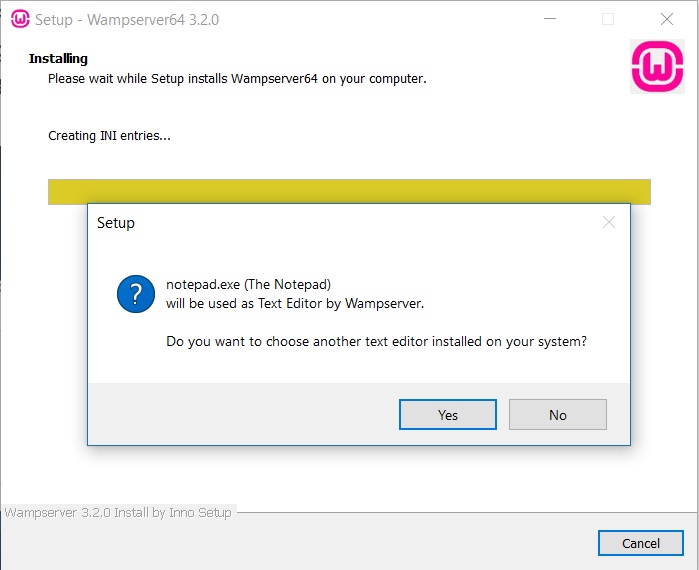
WampServer Installation choose default text editor dialog box screenshot
Installation will proceed. Look for the process to complete
Footstep 15- WAMP startup warning
This is the nearly common event with WAM which is that the WAMP server does not start after installation. Information technology continues to show the status cherry-red. This dialog boxprovides you the path to the aid document in this happen with you lot. These files volition be placed in your WAMP installation binder which is C:/wamp64 in my case and will have the filename instructions_for_use.pdf
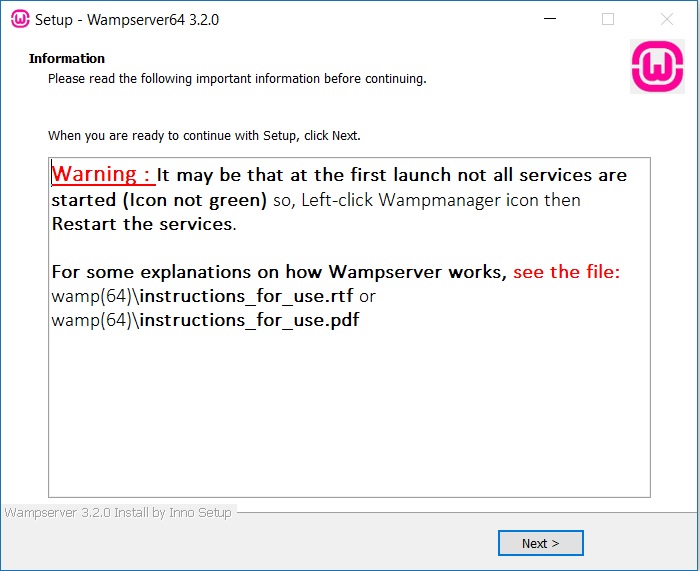
WAMP server startup warning
Click Adjacent to keep.
Footstep 16- Installation Complete
You should see installation complete. Click stop to go out the Wamp Server installation wizard. WampServer should now be installed on your system.
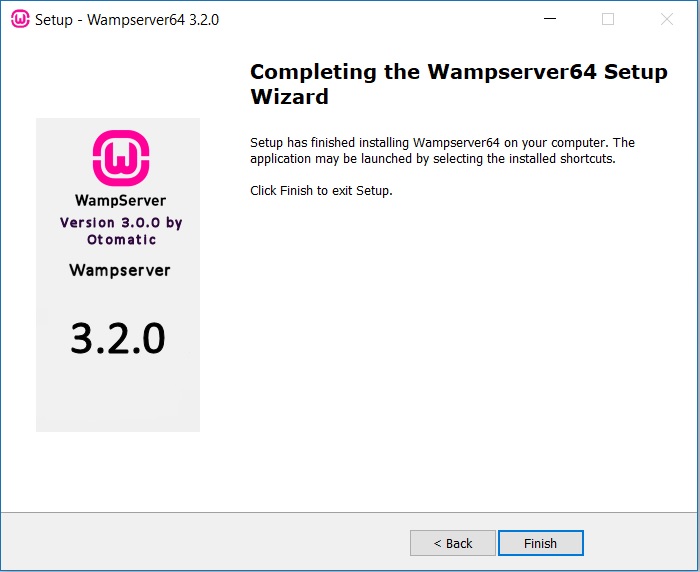
WAMP Server Installation Complete
Footstep 17- Start WampServer
You can now starting time the WampServer past double clicking on the shortcut wampserver icon on your desktop or alternatively launch it from the start menu. After the WamServer starts, yous tin see the Green icon on the taskbar as shown in the screenshot. Initially information technology will be Red, then plough bister and then Dark-green. When it turns green, it means all the services are now running. Else, the WampServer has not started. Please note that you will accept to give administrative privileges for the Server to start. That is just click Yes when you see UAC confirmation dialog box when you click the WampServer icon to first the server.
![]()
WampServer taskbar icon screenshot
When you left click on the icon, you can see the options to get-go, finish and restart the WampServer along with other option which I leave for y'all to explore. If yous confront any problem, please leave the question as a comment, I will answer them.
![]()
WAMP Services
If you lot see the ruby button and it does non plough light-green, endeavor to restart it every bit a beginning trouble shooting step. If the outcome even so persists, it mean that the correct version of VC++ redistrubutable is not installed. Delight follow my post here to install VC++ redistributable if the issue does non resolve
If the WAMP icon turns green, all is good and you tin can follow the below steps.
Enter the post-obit URL in the browser.
http://localhost
At present you lot should see the WAMP Server folio.
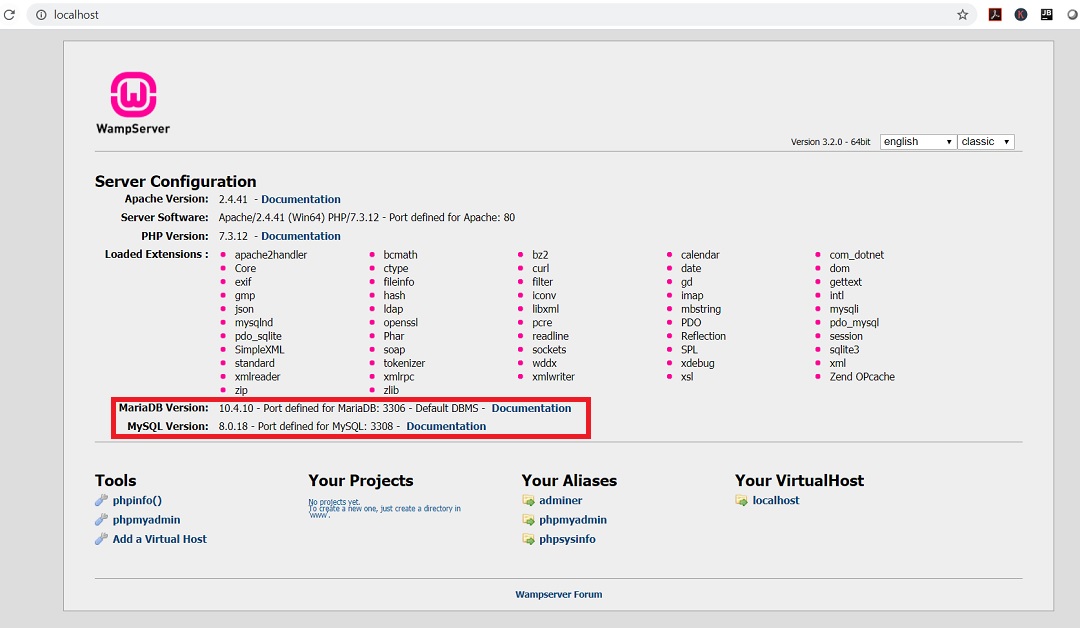
WAMP localhost webpage
By default, WAMP used MariaDB as the database which has become popular now every bit MySQL is no longer free after it was caused by Oracle.
How to start, terminate and restart WAMP services
You can showtime, stop, restart WAMP services by left clicking on the WAMP icon in the taskbar. You lot can also view other data from here.
![]()
WAMP Services
How to change database to MySQL from MariaDB and Vice Versa
Since we have installed both MariaDB and MYSQL during the installation, nosotros can alter the default database to MySQL by following the below steps.
Right Click on the WAMP icon in the taskbar
When the WAMP icon turns green, correct click on the WAMP icon to open the tools dialog box.
Select Tools
Hover your mouse on tools and click on Invert default DBMS MariaDB <-> MySQL
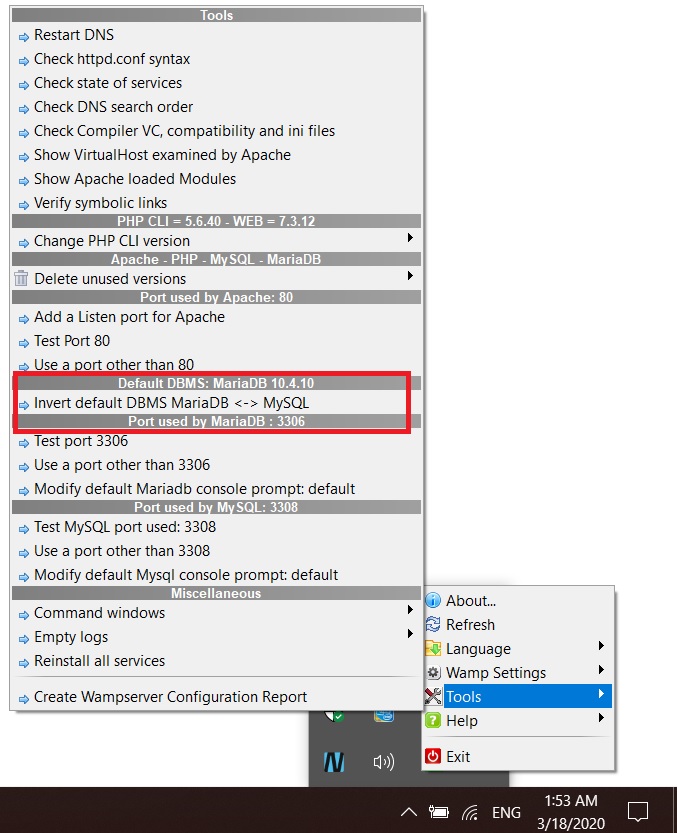
WAMP Server – Invert Database
WAMP Server will automatically restart again. Await for the WAMP Icon to plow dark-green.
Now if y'all go to the page http://localhost, you will see MySQL as the default DBMS.
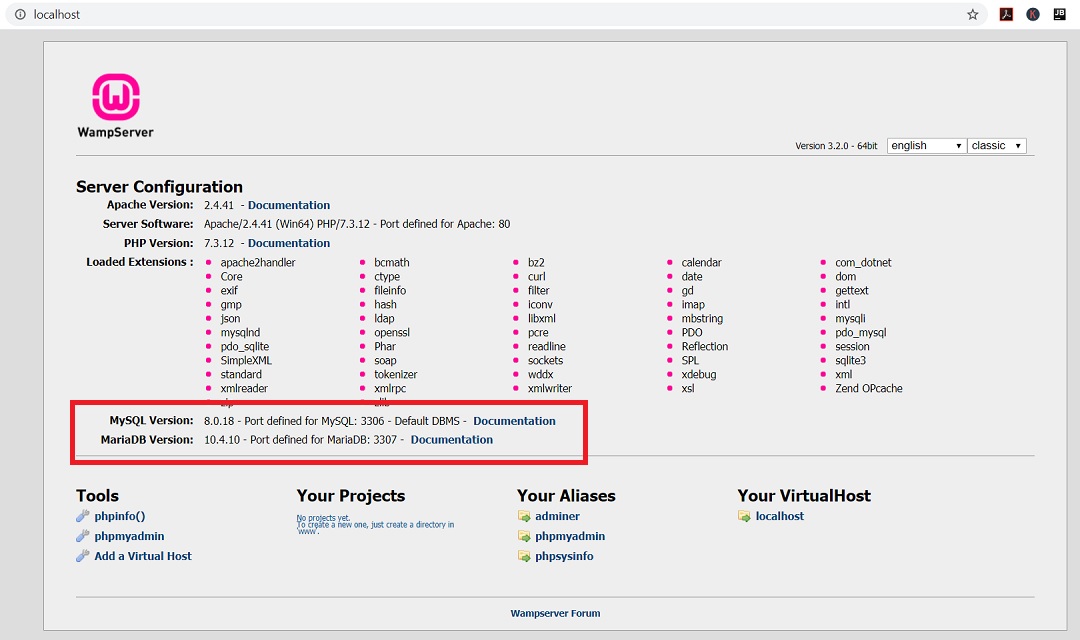
WAMP localhost webpage
To revert back to MariaDB, you will have to follow the aforementioned steps.
How to change PHP version
You can change the PHP version to use for your projection by post-obit steps:
Right Click on the WAMP icon in the taskbar
When the WAMP icon turns light-green, right click on the WAMP icon to open the tools dialog box.
Select Tools
Hover your mouse on tools and Change PHP CLI version and click on the PHP version you lot desire.
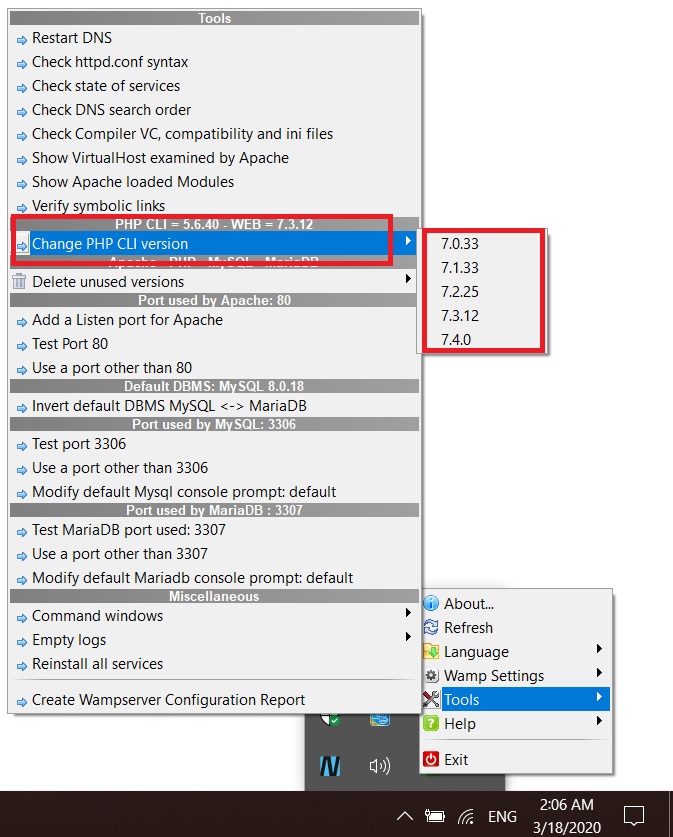
WAMP Server – Change PHP version
Now if y'all go to the folio http://localhost, yous will see version of PHP changed.
How to access phpmyadmin
phpmyadmin is a web based database application that allows you to perform database operations such as create, delete, user management and so on.
You can access phpMyAdmin by going to the url http://localhost/phpmyadmin/
By default, the username is root and countersign is blank. Enter username as root and click on login to login to phpMyAdmin console.

phpMyAdmin login folio
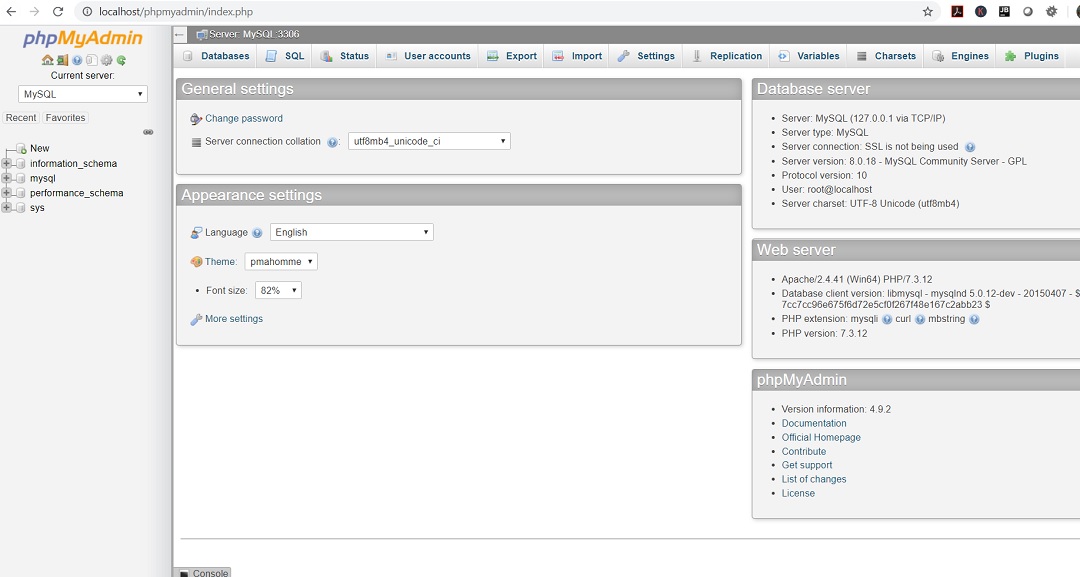
phpMyAdmin Console webpage
How to create new database user and password
To create a new user and password using phpMyAdmin, Please follow my weblog
Source: https://www.shaileshjha.com/how-to-install-wamp-server-on-windows-10/
Posted by: goodingpold1960.blogspot.com
0 Response to "How To Install Wamp Server On Windows 10"
Post a Comment